
Tutorial · 6
Making layouts
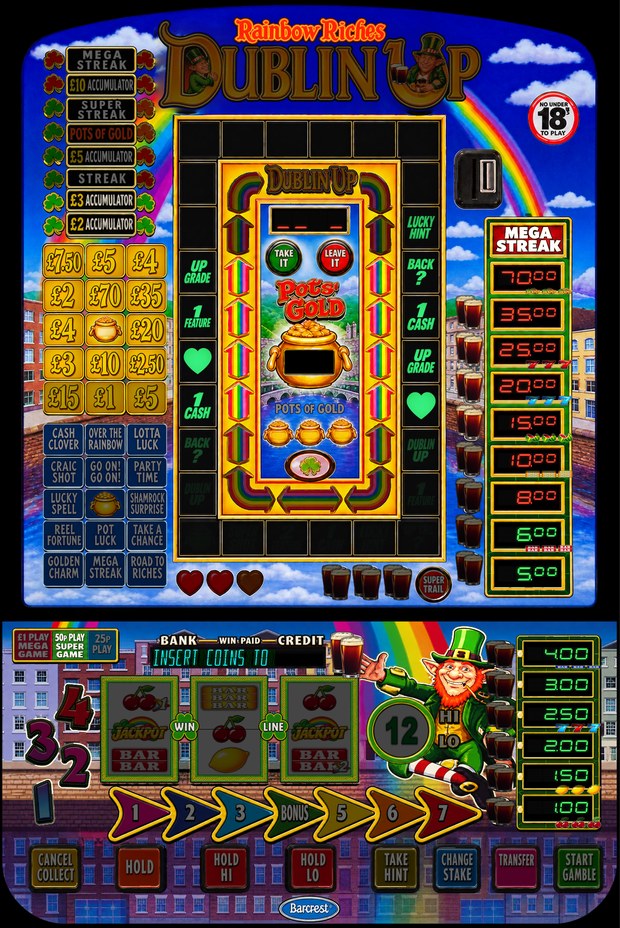
From a game's ROMs to a finished layout: MFME's editor, XFME's designer, and your artwork as a glass lit from behind. Worked through on Rainbow Riches Dublin Up (Barcrest / Inspin, MPU6) and its DX artwork.
1. What you need
- The game: its ROMs and .gam in a folder of their own. Work on a copy.
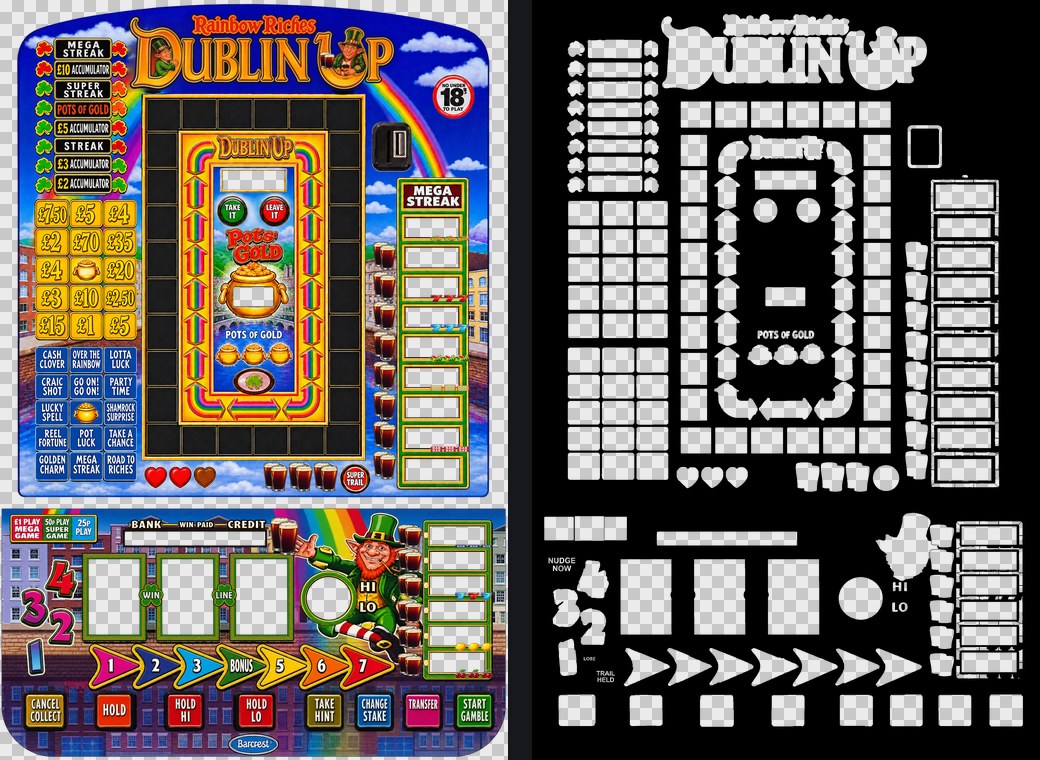
- The glass: a PNG of the whole glass as it is printed, at a good size (the designer halves anything over 3000 pixels). See-through where the reels show, with the lamp areas drawn as they look lit.
- The last black: a PNG the same size, lined up with the glass. Black wherever light must not pass, clear where it shows: every lamp opening and the reel windows. Keep separate openings apart with black, even a thin line, because each clear area is lit only by its own bulbs. Name it so it says last black or mask (here
DublinUp_DX_last_black.png) and keep it beside the glass. - A names file (optional, but it makes the designer far easier):
<game>.placement.tsvbeside the .gam, the lamps by name. You can learn one from the game's test mode (section 4). - A layout that already runs the game, however plain: its reels, displays and buttons, so you can see lamps light as you work. Or begin from the ROMs alone (the box in section 2).
2. Start with the game running
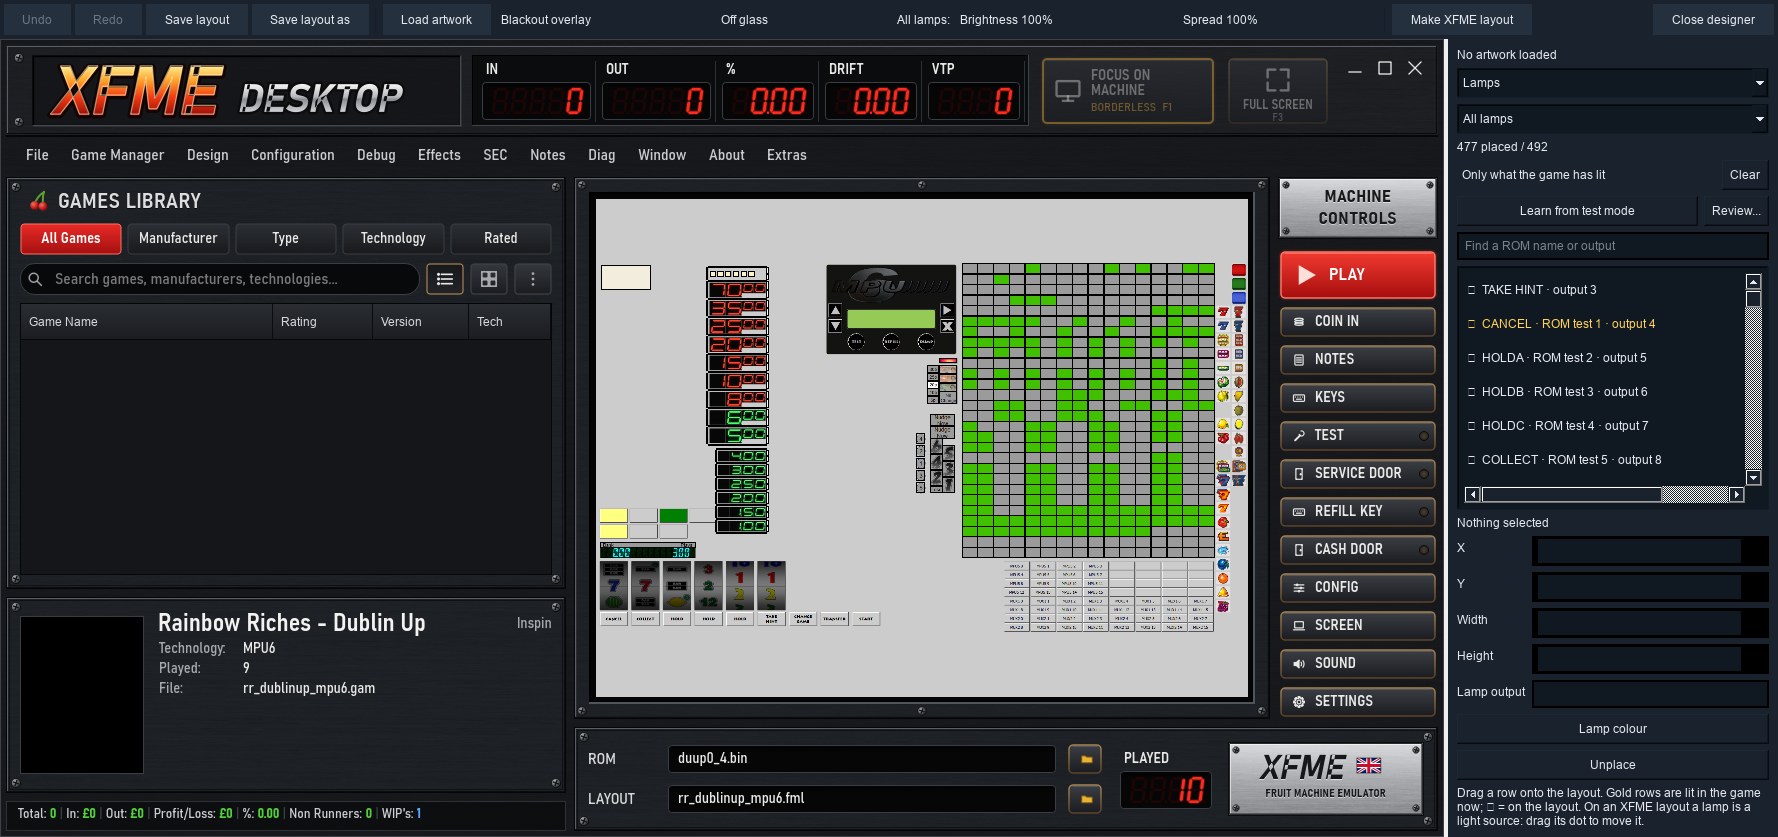
Load the game. Here Dublin Up runs on a plain development layout: its reels, displays, buttons and a grid of test lamps, nothing pretty, but every part works. Everything you do from here happens with the game live, so lamps light and buttons press as you go.
If you are writing the .gam by hand, set Layout to your layout's file, and edit the .gam only while XFME is closed: XFME writes it back when a game closes.
Starting from the ROMs alone
- Design > Layout / Game > New Layout closes the game (it asks Exit Game, Are you sure?) and gives an empty layout.
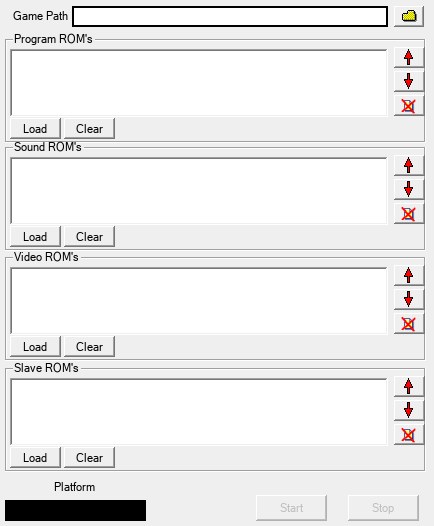
- Design > ROM Loader: choose the platform, Load the program ROMs (and the sound ROMs), then Start.
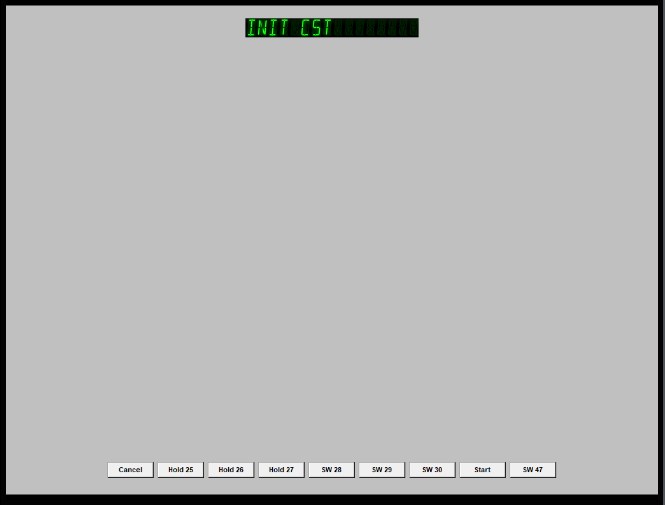
- The game runs on the empty layout, and XFME adds its technology's default panel: the display along the top and the usual buttons on the usual switches along the bottom, plus the door and test switches on the toolbar, enough to reach the test mode. Most technologies have one (MPU4, MPU5, Scorpion 4 and 5, Impact, M1A/B, Epoch, ProConn and more); MPU6 and Pluto 5 / 6 do not yet.
- Carry on in the designer (section 3). Make XFME layout (section 6) writes the finished layout and points the game at it.
3. Open the designer
Extras > Placement Panel. Edit Mode comes on and the window widens by the designer's sidebar, so the layout keeps its size. The designer's own bar runs along the top.
- The bar: Undo / Redo for designer changes, Save layout, Save layout as, Load artwork, the Blackout overlay, Off glass, All lamps Brightness / Spread, Make XFME layout, Close designer.
- The sidebar: what artwork is loaded; Lamps or LED digits; the sections of the names file; n placed / m; Only what the game has lit (the list keeps only lamps that light while it is ticked: watch a lamp light, then drag it); Learn from test mode and Review; Find; the list (▢ not placed yet, ✓ placed, gold = lit in the game now); then the settings of whatever is selected.
4. Lamp names
The designer is much easier when it knows the lamps by name. Dublin Up's names come in its rr_dublinup_mpu6.placement.tsv. For a game without one, Learn from test mode reads the names from the game's own lamp test, the way an engineer would walk through it. Here it is on Bugs Money (Heber Pluto 5), which had no names file:
- Put the machine in its lamp test, as on the cabinet (Bugs Money: hold the door switch, leave the meter display, Test, Hold 3 to
3.1 LAMPS, Start, Cancel). - Press Learn from test mode, then step through every lamp with the game's own buttons. The status line counts as you go and shows the step on the display now, and the list shows each learned name.
- Stop learning, then Review...: one row per step. A lamp the test lights alone is ticked; where the test lights one of its own button lamps, choose which from the list; names can be edited.
- Save names file writes
<game>.placement.tsvbeside the .gam (an old one is kept as a dated .bak), and the sidebar reloads with the names.
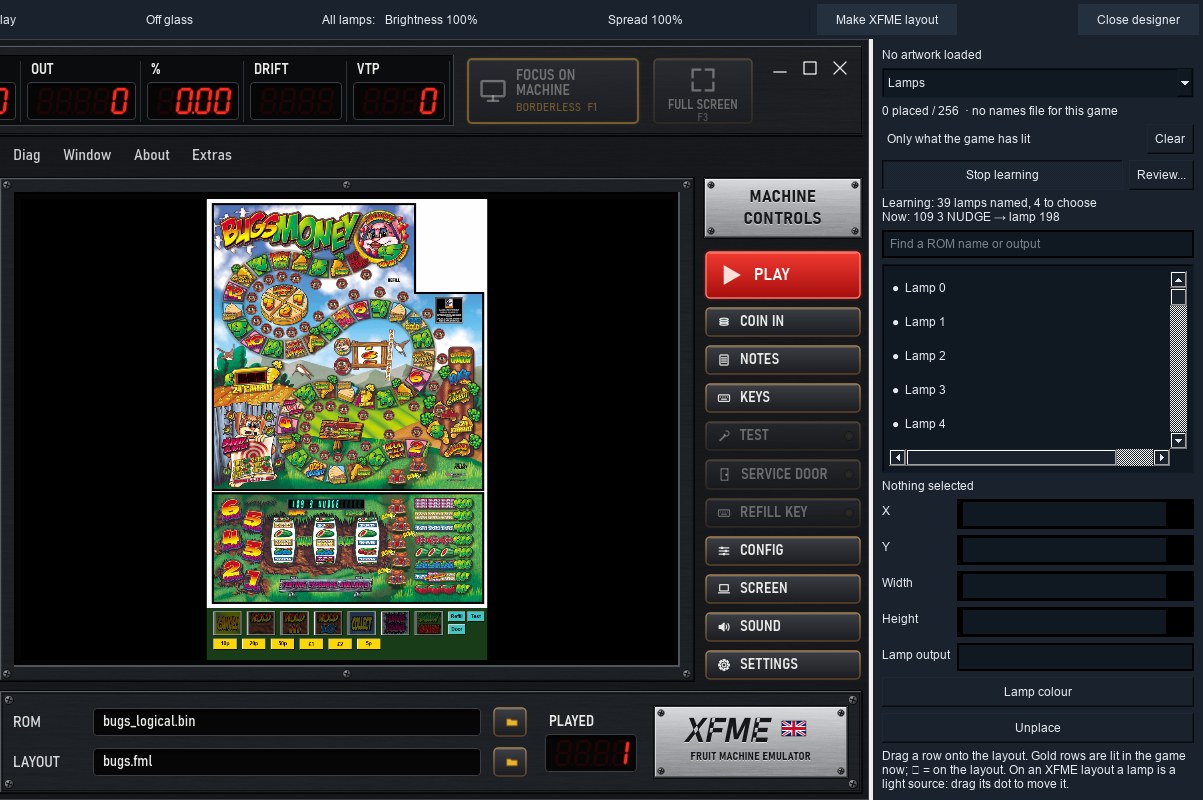
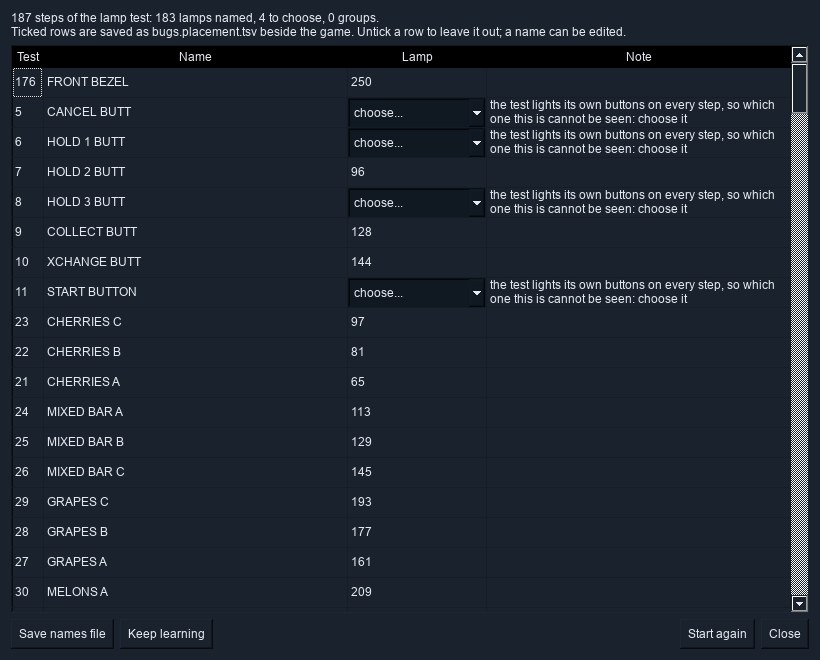
Saved, the sidebar lists Bugs Money's lamps by name (Saved 183 lamp names in bugs.placement.tsv). Learn reads the game's alpha display; dot-matrix displays, ProConn terminals and video screens are not read yet, and Learn for MPU6 games such as Dublin Up is still being tested. Until it arrives, Dublin Up comes with its names file.
5. Load the artwork
Load artwork... and choose the glass. XFME finds the last black beside it (a picture of the same size whose name says last black or mask); if there is none, or more than one, it asks you for it. Then:
- big artwork is halved until its long side is 3000 pixels or less (in the last black a pixel stays clear only where all the pixels it came from were, so thin black lines between openings survive);
- the glass becomes the layout's background, unlit, across the layout's width;
- the glass's clear areas are found and the reels move into them: reel 0 into the first window from the left, reel 1 the next, and so on;
- the sidebar's top line says what was loaded: Artwork: DublinUp_DX_glass.png · 370 openings · 4 reels placed.
Drag the Blackout overlay slider up to see the last black over the layout while you work.
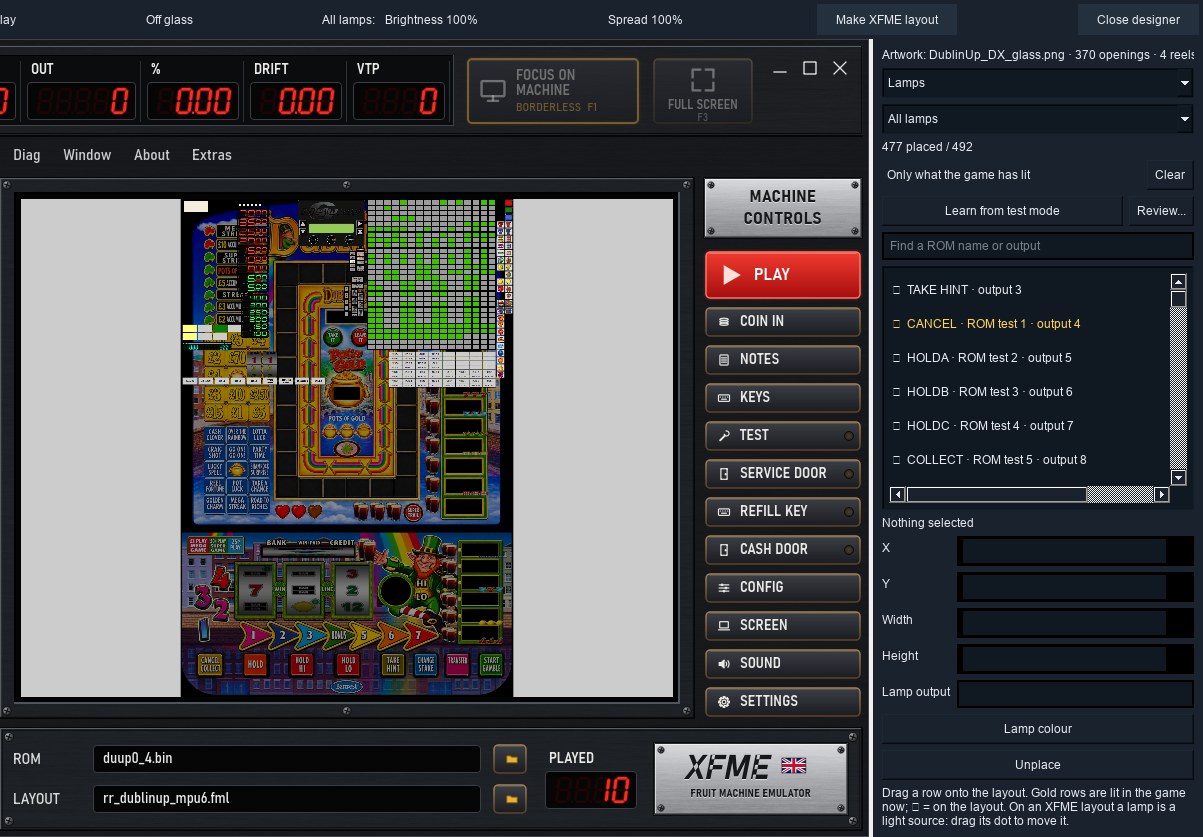
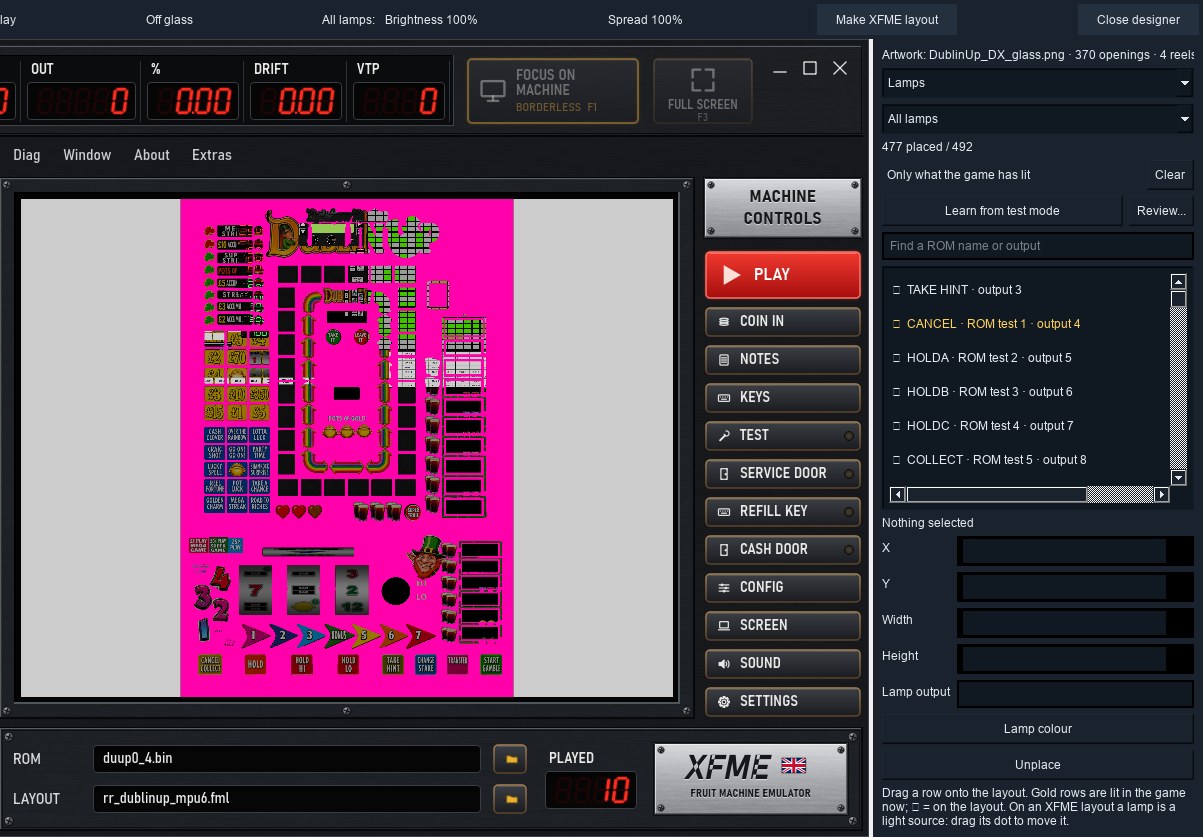
Check every reel. The designer fills windows from the left, so a reel can land in the wrong one: here the development layout's spare reel 0 went into the BANK / CREDIT window, and the hi-lo number reel and the cash reel (the cash reel sits behind the crock) need moving by hand.
6. Make the XFME layout
Make XFME layout... writes a new folder beside the .gam holding the layout: glass.png, lastblack.png, the components (components.v20), the names file and <game>.mrl. It loads it and asks whether to make it the game's layout (the .gam is kept as .gam.bak). From now on the sidebar shows an XFME layout's settings: Spread, Brightness, Fill, Opening, Legend and Bulb colour.
Every component of the old layout comes across as it was: the reels, displays and buttons keep working, and you can move or delete them before or after this step.
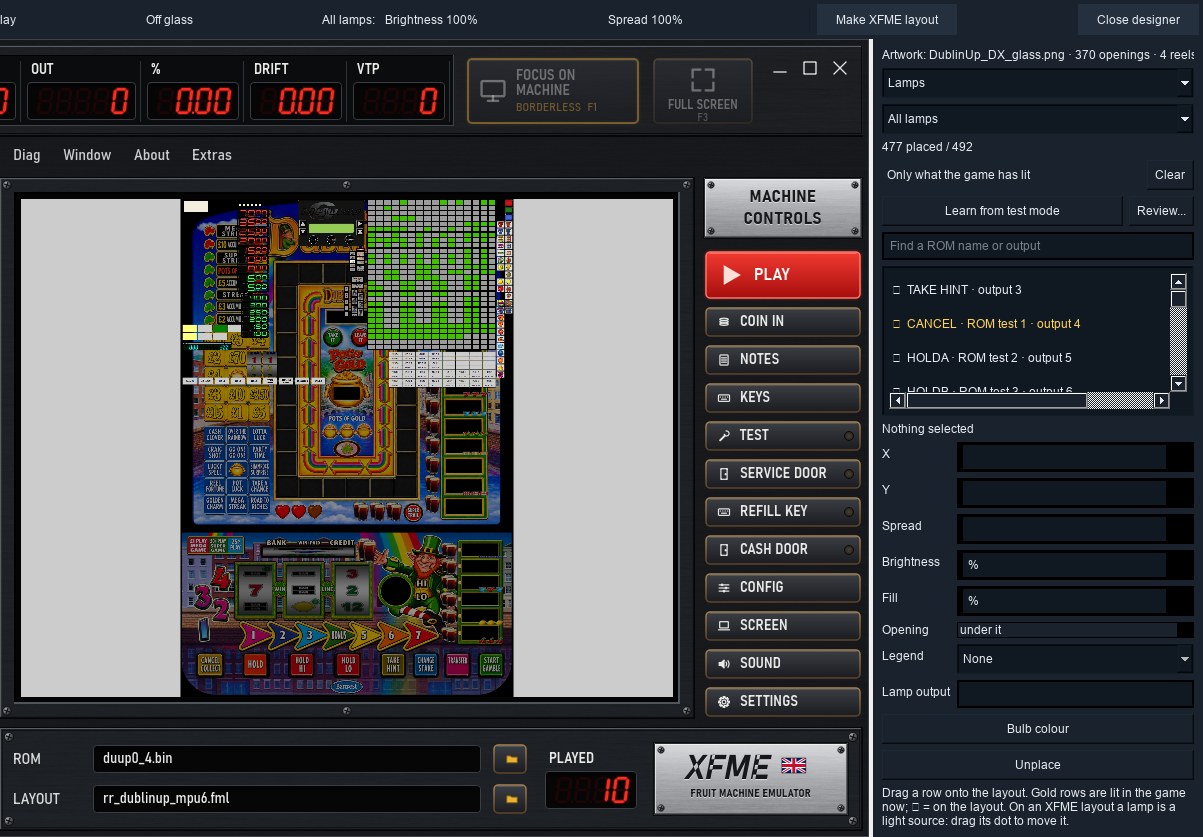
7. Arrange the components on the art
In Edit Mode, put every component the game needs onto the art and delete what the art makes unneeded (here on the layout just made; doing it before Make XFME layout works the same):
- Displays into their windows: the award digits into the MEGA STREAK ladder, the BANK / WIN PAID / CREDIT display into its window.
- Buttons over the painted buttons, or turned into clickable lamps (section 10).
- Stand-in lamps, labels and test cells: delete them. The bulbs behind the glass replace the lamps.
- Operator switches you still want as keys but not on view: put them outside the layout area, or delete them.
- Reels: keep their proportions. Properties > Height = the window's height × the band's width / the window's width keeps the symbols in shape.
Drag a box from empty space to select a group, Shift-click to add or remove one, then drag the group or press Delete. Shift+arrows nudge by one pixel; right-click a group for Alignment, Quick Align and Size; Design > Component List finds a component that is hidden or off screen.
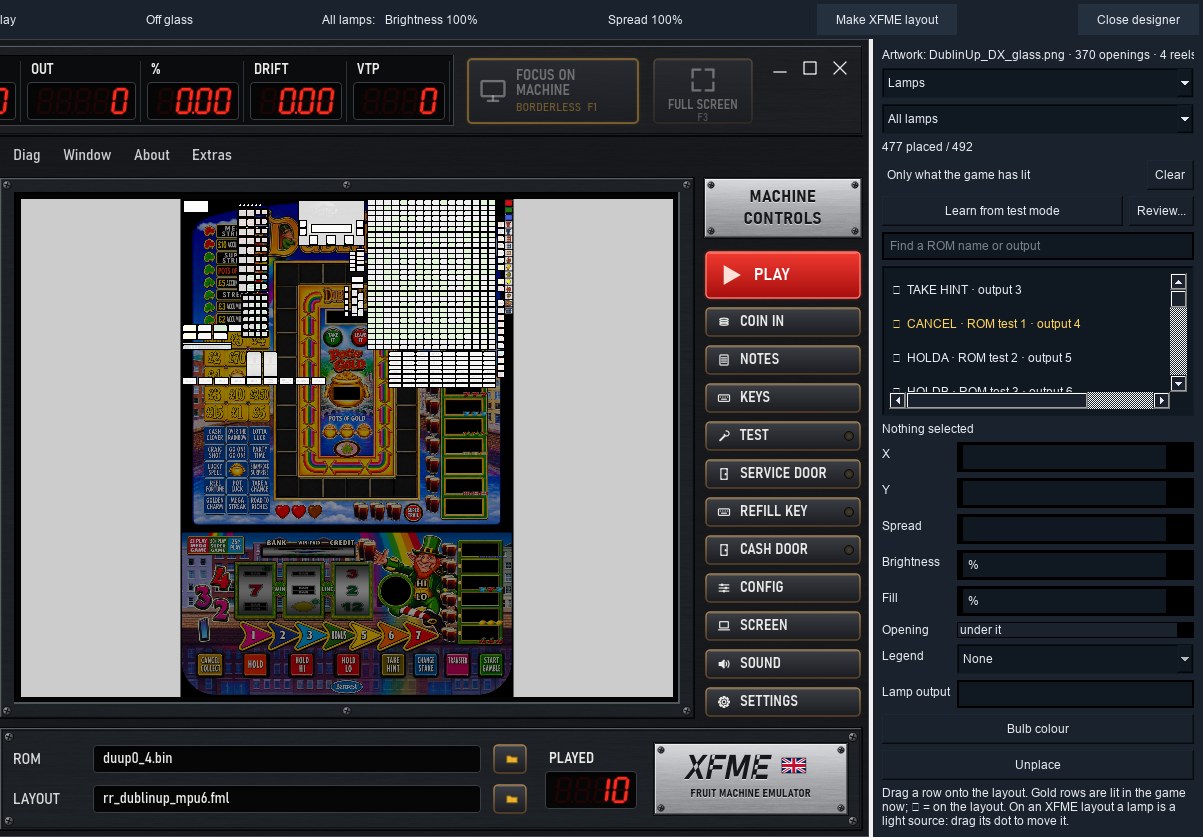
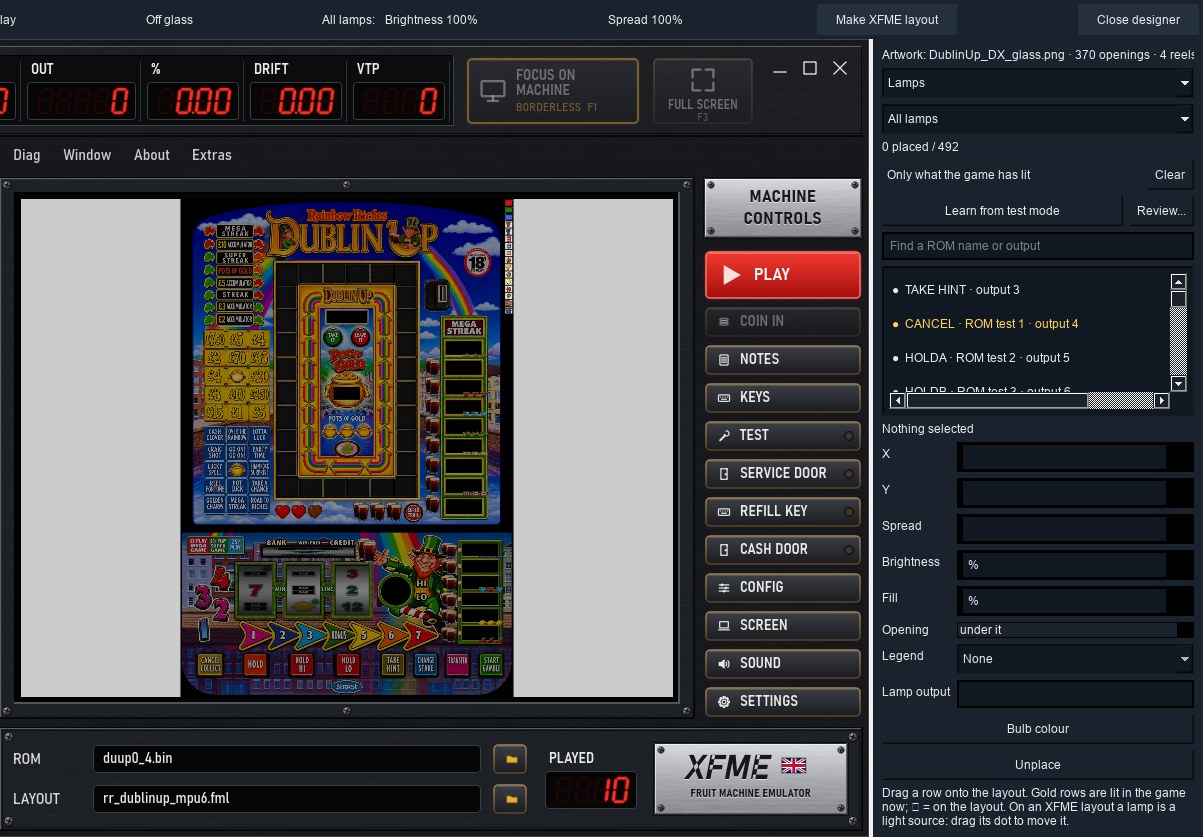
8. Place the bulbs
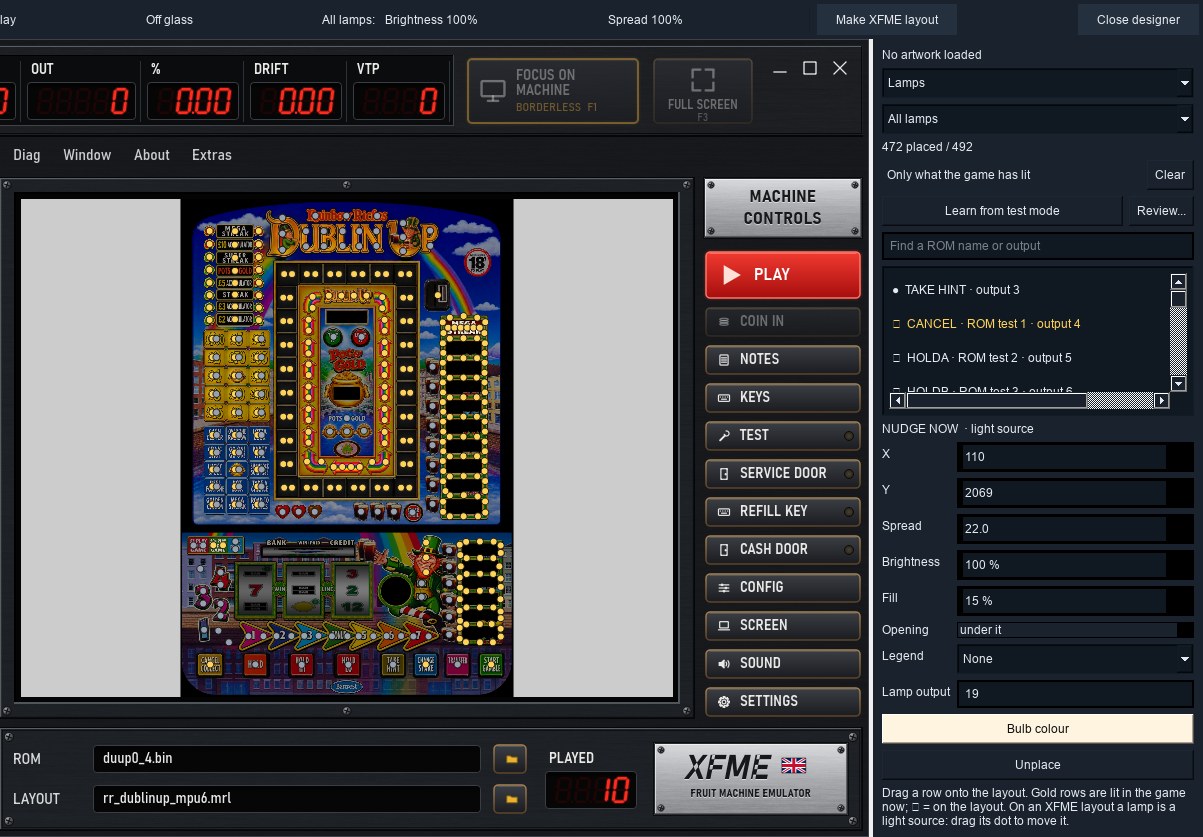
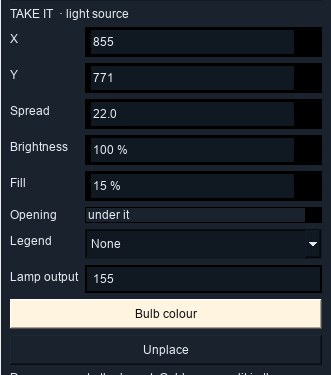
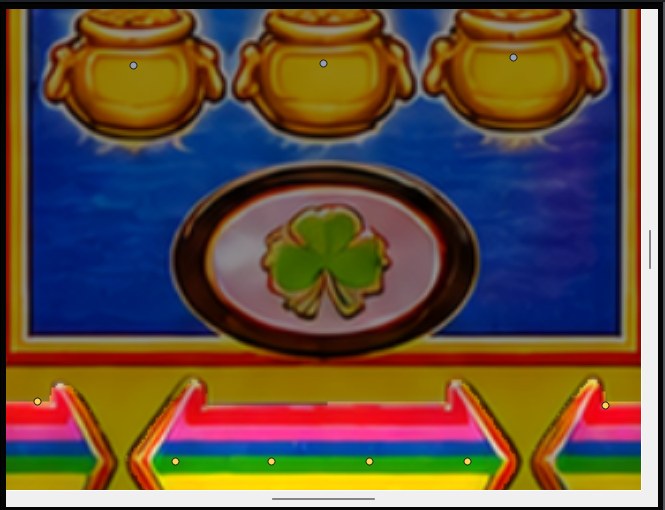
Drag a lamp's row from the list and drop it in the middle of its opening on the glass. On an XFME layout the lamp becomes a light source: a bulb behind the glass, exactly where you dropped it. In Edit Mode each bulb shows as a dot (gold while lit); drag a dot to move it. The quickest way to find a lamp: tick Only what the game has lit, watch the lamp light in the game, then drag its row.
Click a dot to set that bulb:
- X / Y: its place. Lamp output: the lamp number that lights it (change it to move the bulb to another lamp).
- Spread: how far its bright centre reaches. The light never leaves its opening: the last black stops it.
- Brightness: 100 % is the artwork at full brightness in front of the bulb. Fill: how much light spreads evenly over the whole opening (higher is flatter).
- Bulb colour: warm white unless you choose; a coloured bulb tints the light. Unplace removes it.
Several bulbs can light one opening (their light adds up), and one lamp can have several bulbs: drop its row again. LED digits: switch the list to LED digits; dropping a digit makes its seven segments and point as lamps, wired as the names file says.
9. Reel lamps: the reel grid
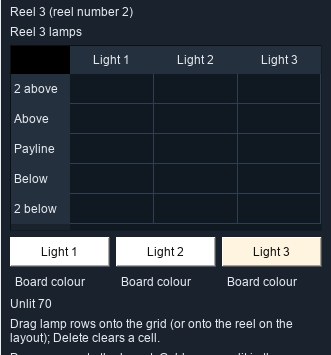
Reel lamps belong to the reel, not the glass (a bulb inside a reel window sits under the reel and never shows).
- Click the reel. The sidebar shows its grid: the window's five rows (2 above, Above, Payline, Below, 2 below) by Light 1, Light 2 and Light 3.
- Drag lamp rows onto the cells, or drop a lamp straight onto the reel: it goes into the row under the pointer, on the first free light. Delete clears a selected cell.
- The Light 1 / 2 / 3 buttons set each light's bulb colour. Board colour lights the reel in the colour the game sends (Dublin Up's reels are white, red, green or blue as the game drives them; MFME only ever drew the white).
- Unlit: how bright the reel is where no lamp is lit (0 black, 255 fully lit; about 70 looks right).
10. Buttons and coins on the art
When the buttons or the coin slot are part of the artwork, make them clickable lamps so the artwork stays clean: a Lamp component (right-click > New > Lamps > Lamp) over the painted button, with the button's switch in the Lamp page's Button field, no pictures, Graphic and No Outline ticked. It draws nothing, a click presses the switch, and its key (Shortcuts) still works. For a coin slot choose the Coin instead of a switch. Light the button with a bulb behind it. Bring it to the front (right-click > Bring To Front) so nothing covers it.
11. Finish, save and play
- Off glass: how bright the glass is with its lamps off, as in a lit room.
- All lamps: Brightness / Spread scales every bulb at once (each keeps its own setting).
- Save layout (F7): the previous file is kept as .bak.
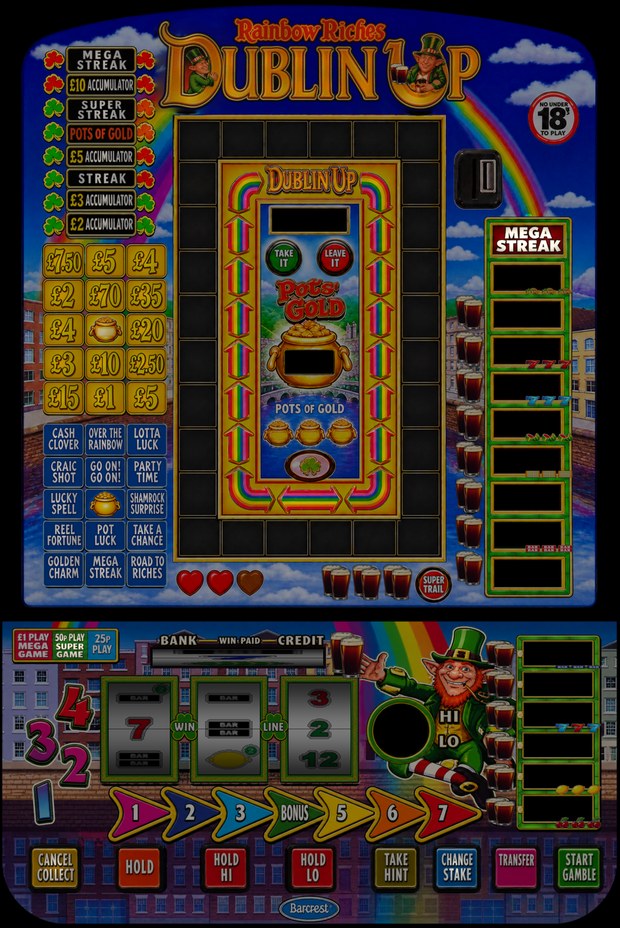
- Close the designer, leave Edit Mode (Ctrl+E) and play: coins, every button, the lamps in the game's lamp test, the reels landing on the line, every display.
12. When something is wrong
| You see | Look at |
|---|---|
| The game starts on its old layout | The .gam's Layout line (edit it only with XFME closed). |
| A lamp never lights | Its number (the names file, or the game's lamp test); on an XFME layout, that its bulb is inside an opening. |
| Light spills into a neighbour | The last black has no black line between the two openings. |
| Reel lamps do nothing | The reel grid: lamps in the rows, a light colour set, Unlit below 255. |
| Reel symbols sit off the line | The reel's Band Offset; Reversed if it spins the wrong way. |
| A reel is in the wrong window | Load artwork fills windows from the left: drag the reel to its own window. |
| A button on the art does not press | The clickable lamp's Button number, and that it is in front (Bring To Front). |
| The Layout Font Check window opens | A font the layout writes with is missing: put it in the game's Fonts folder. MFME's own MFME.ttf comes with XFME. |
| Changes vanished | Saved? (F7). The .bak beside the file is the previous version. |